Web基本服务搭建和访问控制
Web服务的基本搭建和访问控制
环境:
web:
[root@Web ~]# ifconfig | head -2
  eth0      Link encap:Ethernet  HWaddr 52:54:01:AC:DE:C4
          inet addr:192.168.122.10  Bcast:192.168.122.255  Mask:255.255.255.0
[root@rh_1 ~]# yum -y install httpdNDS:
Link encap:Ethernet  HWaddr 52:54:02:AC:DE:C4
         inet addr:192.168.122.20  Bcast:192.168.122.255  Mask:255.255.255.0
          [root@DNS ~]# rpm -qa  install bind bind-chroot caching-nameserver
        bind-9.3.6-20.P1.el5_8.5
         bind-chroot-9.3.6-20.P1.el5_8.5
        caching-nameserver-9.3.6-20.P1.el5_8.5
一、搭建基本Web服务
1 配置http主配置文件
[root@rh_1 ~]# vim /etc/httpd/conf/httpd.conf
74 KeepAlive On
265 ServerName www.360.com:80             //本站点的FQDN名称
281 DocumentRoot "/var/www/html"          //网页文档的跟目录
391 DirectoryIndex index.html index.php   //默认索引页/首页文件
2、在局部中设置授权访问
[root@rh_1 ~]# cat /etc/httpd/conf/httpd.conf | tail -8
<Directory "/var/www/html">  //针对该目录下的网页生效,如果在全局里设置、则对所有hhtp生效。
 Order allow,deny            //拒绝所有
 Allow from all              //允许所有
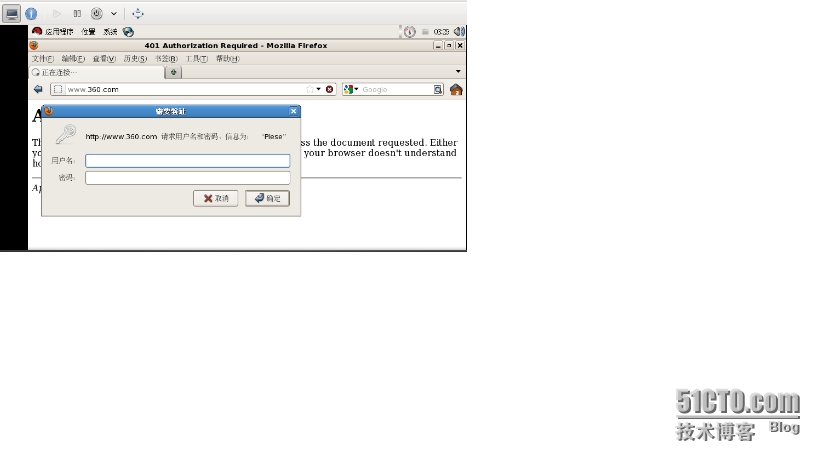
 AuthName "Plese"            //认证领域,用户弹出提示
 AuthType basic              //认证类型为Basic
 AuthUSERFile /etc/httpd/.user  //用户数据文件数据路径
 Require valid-user             //有效用户都可以访问
 #Allow from 192.168.12.50      //只允许192.168.12.50访问。
 </Directory>
3、创建用户密码文件,创建用户“abc”,密码“123”。
[root@rh_1 ~]# touch /etc/httpd/.user
[root@rh_1 ~]# htpasswd -c /etc/httpd/.user abc
New password:
Re-type new password:
Adding password for user abc
4、重启服务。
[root@rh_1 ~]# service httpd restart
[root@rh_1 ~]# chkconfig httpd on
5 在/var/www/html下存放一个网页文档。
[root@rh_1 ~]# touch  /var/www/html/index.html
[root@rh_1 ~]# vim /var/www/html/index.html
[root@rh_1 ~]# cat /var/www/html/index.html
www.360.com
二、 配置DNS用来解析HTTP
1、编辑DNS主配置文件
[root@DNS ~]# cd /var/named/chroot/etc/
   [root@DNS etc]# cp -p named.caching-nameserver.conf named.conf
[root@DNS etc]# vim named.conf
   15         listen-on port 53 { 192.168.122.20; };
   26         allow-query     { any; };
   27         allow-query-cache { any; };
   36         match-clients      { any; };
   37         match-destinations { any; };
2、编辑数据文件
[root@DNS etc]# cat named.rfc1912.zones | tail -4
zone "360.com" IN {
type master;
file "360.zone";
};
3、 编辑区域数据文件
[root@DNS etc]# cd /var/named/chroot/var/named/
[root@DNS named]# cp -p named.local 360.zone
[root@DNS named]# cat  360.zone
$TTL86400
@       IN      SOA     360.com. root.360.com.  (
                                      1997022700 ; Serial
                                      28800      ; Refresh
                                      14400      ; Retry
                                      3600000    ; Expire
                                      86400 )    ; Minimum
        IN      NS      dns1.360.com.
dns1    IN      A       192.168.122.20
www     IN      A       192.168.122.10
4、启动服务
[root@DNS named]# service named restart
[root@DNS named]# chkconfig named on
检测:
在客户端访问:要把DNS指向192.168.122.20
本文出自 “linux网络服务搭建” 博客,请务必保留此出处http://8824130.blog.51cto.com/8814130/1405567
郑重声明:本站内容如果来自互联网及其他传播媒体,其版权均属原媒体及文章作者所有。转载目的在于传递更多信息及用于网络分享,并不代表本站赞同其观点和对其真实性负责,也不构成任何其他建议。


