手动制作tiny-linux
目的给一个新的主机提供一个微型的linux内核,并在上面运行服务。
手动制作一个tiny-linux,内核可以从官网站点下载下来,我这里已经预备了一个:放在/usr/src目录下,解压并创建了一个软连接ln –sv linux-3.13.6 linux
cd /usr/src/
[root@libin src]# ls
debug kernels linux linux-3.13.6
[root@libin src]# cd linux
[root@libin linux]# ls
arch CREDITS drivers include Kbuild lib mm Module.symvers REPORTING-BUGS security tools vmlinux
block crypto firmware init Kconfig MAINTAINERS modules.builtin net samples sound usr vmlinux.o
COPYING Documentation fs ipc kernel Makefile modules.order README scripts System.map virt
第一步:cd到linux目录下执行make allnoconfig
[root@libin linux]# make allnoconfig
scripts/kconfig/conf --allnoconfig Kconfig
#
# configuration written to .config
#
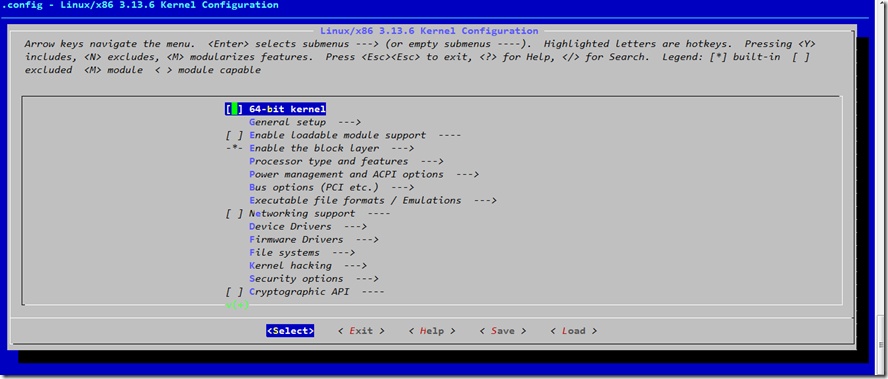
第二步选择make menuconfig,(注意此时如果用ssh连接的linux,这里是要一定不能缩放窗口)
会弹出TUI界面,方便大家勾选!
![]() 一定要选上支持块设备,因为自制linux需要支持I/O设备的,磁盘的I/O在底层的组成就是block设备。
一定要选上支持块设备,因为自制linux需要支持I/O设备的,磁盘的I/O在底层的组成就是block设备。
然后是
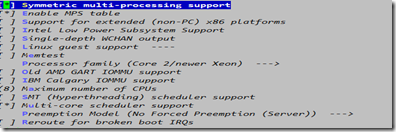
![]() 在进程家族里选择你的cpu支持的型号,最好跟你的物理CPU型号保持一致,我这里选的我自己的core2
在进程家族里选择你的cpu支持的型号,最好跟你的物理CPU型号保持一致,我这里选的我自己的core2
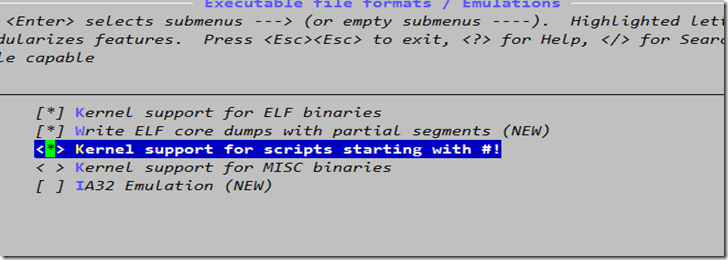
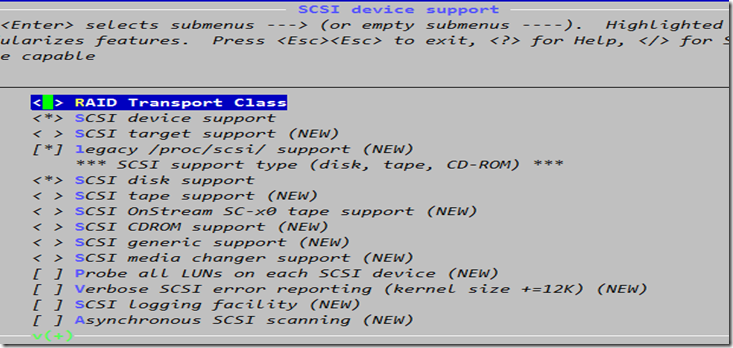 这里是SCSI的选择,一定要勾选SCSI disk support,支持SCSI磁盘。
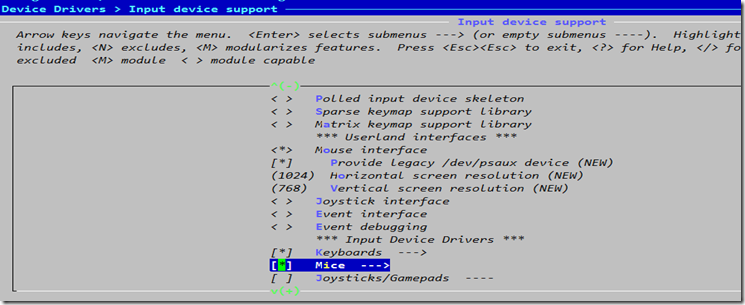
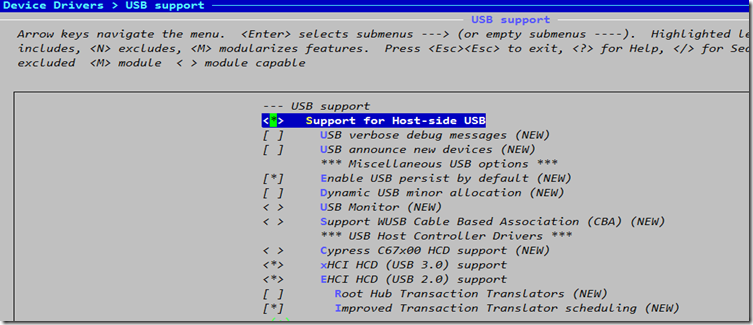 然后是USB选项,选择支持OHCI,UHCI,支持USB1.1 USB2.0 USB3.0等
然后退出并保存,这时执行make –j 4(4这个数字可以自主选择)
出现如下界面:
[root@libin linux]# make -j 4
scripts/kconfig/conf --silentoldconfig Kconfig
CHK include/config/kernel.release
make[1]: Nothing to be done for `all‘.
CHK include/generated/uapi/linux/version.h
UPD include/config/kernel.release
CHK include/generated/utsrelease.h
make[1]: Nothing to be done for `relocs‘.
UPD include/generated/utsrelease.h
一定要看是否新磁盘就是要做的linux磁盘是否分区格式化了
sdb 8:16 0 15G 0 disk
├─sdb1 8:17 0 70.6M 0 part
└─sdb2 8:18 0 6G 0 part
[root@libin ~]# fdisk -l /dev/sdb
Disk /dev/sdb: 16.1 GB, 16106127360 bytes
255 heads, 63 sectors/track, 1958 cylinders
Units = cylinders of 16065 * 512 = 8225280 bytes
Sector size (logical/physical): 512 bytes / 512 bytes
I/O size (minimum/optimal): 512 bytes / 512 bytes
Disk identifier: 0xbf0ebe4e
Device Boot Start End Blocks Id System
/dev/sdb1 1 9 72261 83 Linux
/dev/sdb2 10 793 6297480 83 Linux
[root@libin linux]# mount /dev/sdb1 /mnt/boot(新磁盘的boot分区)
[root@libin linux]# mount /dev/sdb2 /mnt/sysroot(新磁盘的rootfs)
在/mnt/boot中创建grub
[root@libin /]# grub-install --root-directory=/mnt /dev/sdb
Installation finished. No error reported.
This is the contents of the device map /mnt/boot/grub/device.map.
Check if this is correct or not. If any of the lines is incorrect,
fix it and re-run the script `grub-install‘.
(fd0) /dev/fd0
(hd0) /dev/sda(这个很重要,是新主机的第一个磁盘)
(hd1) /dev/sdb
(hd2) /dev/sdc
然后可以编辑grub.conf
[root@libin grub]# pwd
/mnt/boot/grub
[root@libin grub]# vim grub.conf
timeout=6
default=0
title Customed linux (3.13.6)
root (hd0,0)
kernel /bzImage ro root=/dev/sda2 init=/sbin/init
cd到mnt目录下,创建几个有关的目录
[root@libin grub]# cd /mnt/sysroot/
[root@libin sysroot]# mkdir -pv bin boot dev etc/init.d home lib64 media mnt proc root sbin sys tmp usr var
编辑sbin/init
#!/bin/bash
#
echo –e “你想输出的语句"
mount –n –t proc proc /proc
mount –n –t sysfs sysfs /sys
mount –n –t devtmpfs none /dev
mount –n -o remount,rw /dev/sda2 /
/bin/bash
chmod +x sbin/init
复制各个命令到/mnt/sysroot/bin或sbin下
然后复制之前编译好的内核到/mnt/boot目录下
[root@libin linux]# cp arch/x86/boot/bzImage /mnt/boot
cp: overwrite `/mnt/boot/bzImage‘? y
[root@libin linux]# pwd 注意当前目录
/usr/src/linux
[root@libin ~]# sync
[root@libin ~]# sync
[root@libin ~]# sync sync几遍
然后挂起宿主机,开启新主机试试。
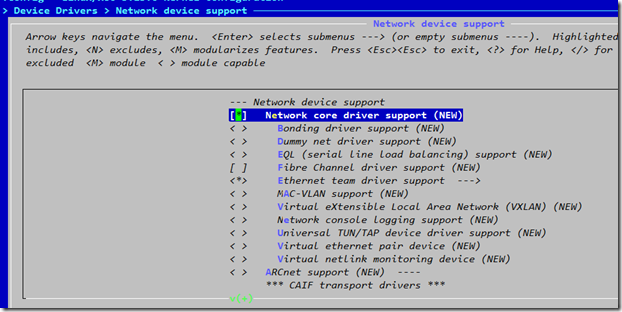
这里想要提供网络功能还要去宿主机上选择make menuconfig 重新编译加载
这里如果想要让新主机有很多功能,就要安装busybox,工作原理用链接方式提供大量二进制命令。
welcome to here,as a newbie of Linux.
[root@libin ~]# ls
1 a.out dropbear-2013.58.tar.bz2 key3
1.txt bincp.sh go home linux-3.13.6.tar.xz
2.txt busybox-1.22.1 id1_rsa.pub loganalyzer-3.6.5.tar.gz
anaconda-ks.cfg busybox-1.22.1.tar.bz2
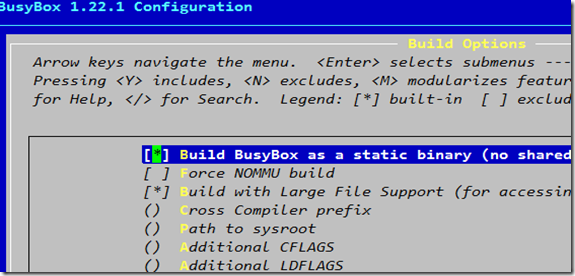
静态编译busybox需要glibc-static
make menuconfig这里跟前面的界面很相似
但默认里面没有bash的,有支持bash的ash
可以把之前在sysroot目录里面的先移走。
做好了以后就make && make install
sync并创建proc等需要的目录。
[root@libin /]# du -sh /mnt/sysroot/
2.2M /mnt/sysroot/
看看,才2.2M
编辑/etc/inittab
::sysinit:/etc/rc.d/rc.sysinit
::respawn:/sbin/getty 19200 tty1
::respawn:/sbin/getty 19200 tty2
::respawn:/sbin/getty 19200 tty3
::respawn:/sbin/getty 19200 tty4
::respawn:/sbin/getty 19200 tty5
::respawn:/sbin/getty 19200 tty6
::ctrlaltdel:/sbin/reboot
::shutdown:/bin/umount -a –r
这里用户需要登录,我们需要给用户弄个终端
有关登录的在/mnt/sysroot/sbin下有个叫getty的文件
[root@libin sysroot]# sbin/getty -h
BusyBox v1.22.1 (2014-08-21 01:58:21 CST) multi-call binary.
Usage: getty [OPTIONS] BAUD_RATE[,BAUD_RATE]... TTY [TERMTYPE]
Open TTY, prompt for login name, then invoke /bin/login
-h Enable hardware RTS/CTS flow control
-L Set CLOCAL (ignore Carrier Detect state)
-m Get baud rate from modem‘s CONNECT status message
-n Don‘t prompt for login name
-w Wait for CR or LF before sending /etc/issue
-i Don‘t display /etc/issue
-f ISSUE_FILE Display ISSUE_FILE instead of /etc/issue
-l LOGIN Invoke LOGIN instead of /bin/login
-t SEC Terminate after SEC if no login name is read
-I INITSTR Send INITSTR before anything else
-H HOST Log HOST into the utmp file as the hostname
getty显示串行终端,屏幕显示字符都是一个个刷屏显示出来的,一秒钟多少字符,需要定义速率
getty会自动启动loggin程序,打印登录提示符给你,由于要登录了,一定要出有账号密码!!
这里千万要在新主机即(/mnt/sysroot/etc/下创建passwd,group,shadow等文件!)
使用openssl生成密码串:[root@libin sysroot]# openssl passwd -1 -salt ‘openssl rand –hex4‘
然后vim编辑etc/passwd
[root@libin sysroot]# vim etc/shadow
root:$1$openssl $VU6X/HjX8/OhuHJOBy/Jn0:16250:0:99999:7:::
tom:$1$openssl $VU6X/HjX8/OhuHJOBy/Jn0:16250:0:99999:7:::
保存退出
还要确保shadow的权限是600!!
由于umount命令 –a -r我们还需要提供一个fstab文件
vim fstab
/dev/sda2 / ext4 defaults 0 0
/dev/sda1 /boot ext4 defaults 0 0
proc /proc proc defaults 0 0
sysfs /sysfs sysfs defaults 0 0
\[root@libin etc]# ls
fstab inittab rc.d
[root@libin etc]# cd rc.d
[root@libin rc.d]# ls
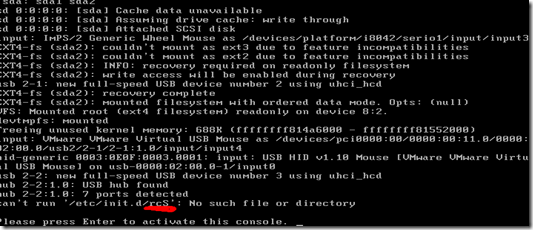
还需要/etc/rc.d/rc.sysinit脚本 编辑rc.sysinit脚本
#!/bin/sh
echo -e "welcome"
mount -n -o remount,rw /dev/sda2 /
mount -a
mdev –s 动态创建设备文件
需要在rc.sysinit定义读写方式挂载根文件系统
[root@libin rc.d]# chmod +x rc.sysinit
[root@libin rc.d]# ls
rc.sysinit
还需要vim /mnt/sysroot/etc/profile
export PS1=‘[\u@\H \w]\$ ‘
如果出错,cd到sysroot目录下,find . | cpio -o –H newc | gzip -9 > /root/sysroot.gz
fuser –km /mnt/sysroot
umount /dev/sdb2
然后是mke2fs –t ext4 /dev/sdb2
mount /dev/sdb2 /mnt/sysroot
[root@libin ~]# gunzip /root/sysroot.gz
[root@libin ~]# cpio -i < /root/sysroot
10574 blocks
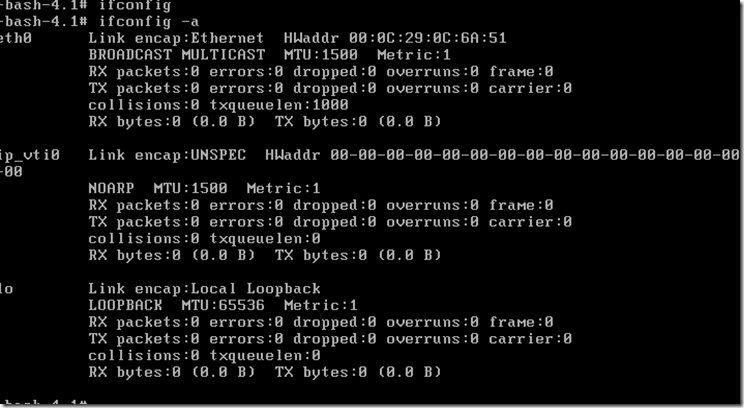
切换到新主机上,使用ifconfig命令就能看到了
使用poweroff还可以关机!
郑重声明:本站内容如果来自互联网及其他传播媒体,其版权均属原媒体及文章作者所有。转载目的在于传递更多信息及用于网络分享,并不代表本站赞同其观点和对其真实性负责,也不构成任何其他建议。


