
Linux无人值守
配置网络安装的说明及步骤演示
1、配置nfs服务器,用于存放linux系统的安装文件
2、配置tftp服务器,用于提供客户端pxe引导所必须的启动文件
3、配置dhcp服务器,用于给客户端提供ip地址及其他信息
4、配置kickstart,用于自动应答操作系统安装
5、使用网卡的pxe功能引导客户机。
配置nfs服务器
创建共享目录并将光盘内容拷贝到共享目录中去
[root@localhost ~]# mkdir /data/sys -p
[root@localhost ~]# cp -a /media/* /data/sys/
安装配置nfs
[root@localhost ~]# rpm -qa | grep nfs
nfs-utils-1.2.3-36.el6.x86_64
nfs-utils-lib-1.1.5-6.el6.x86_64
nfs4-acl-tools-0.3.3-6.el6.x86_64
[root@localhost ~]# echo "/data/sys192.168.100.0/24(ro,sync)" >> /etc/exports
[root@localhost ~]# cat /etc/exports
/data/sys 192.168.100.0/24(ro,sync)
启动服务并验证是否共享
[root@localhost ~]# service nfs start
[root@localhost ~]# showmount -e 192.168.100.1
Export list for 192.168.100.1:
/data/sys 192.168.100.0/24
安装配置tftp服务器
客户机需要通过tftp服务器下载引导文件并执行。因此,需要通过配置tftp服务器和pxe的引导配置完成这个过程。
安装tftp
[root@localhost ~]# yum -y install tftp-server
修改配置文件启动tftp
[root@localhost ~]# vim /etc/xinetd.d/tftp
# default: off
# description: The tftp server serves files using the trivial filetransfer \
# protocol. The tftp protocol is often used to bootdiskless \
# workstations, downloadconfiguration files to network-aware printers, \
# and to start theinstallation process for some operating systems.
service tftp
{
socket_type = dgram
protocol = udp
wait = yes
user = root
server = /usr/sbin/in.tftpd
server_args = -s /var/lib/tftpboot
disable = no #yes改为no
per_source = 11
cps = 100 2
flags = IPv4
}
设置完成启动服务
[root@localhost ~]# service xinetd start
Pxe引导配置
Pxe启动映像文件由syslinux软件包提供,安装syslinux,就会生成一个pxelinux.0,将pxelinux.0这个文件复制到“/tftpboot”
[root@localhost ~]# yum -y install syslinux
[root@localhost ~]# cp /usr/share/syslinux/pxelinux.0/var/lib/tftpboot/
设置用于启动的内核文件(/media目录为系统盘挂载的位置)
[root@localhost ~]# cp /media/images/pxeboot/initrd.img/var/lib/tftpboot/
[root@localhost ~]# cp /media/images/pxeboot/vmlinuz/var/lib/tftpboot/
将光盘中的“isolinux/isolinux.cfg”文件复制为”/tftpboot/pxelinux.cfg/default”
[root@localhost ~]# cd /var/lib/tftpboot/
[root@localhost tftpboot]# mkdir pxelinux.cfg
[root@localhost tftpboot]# cp /media/isolinux/isolinux.cfg/var/lib/tftpboot/pxelinux.cfg/default
安装配置dhcp服务器
在pxe引导安装过程中,pxe客户机通过dhcp服务获取pxe客户机的ip地址、pxe引导文件名称;然后客户机在通过tftp协议从tftp服务器下载引导文件。
[root@localhost ~]# yum -y install dhcp
配置dhcp服务器
[root@localhost ~]# vim /etc/dhcp/dhcpd.conf
# DHCP Server Configuration file.
# see/usr/share/doc/dhcp*/dhcpd.conf.example
# see dhcpd.conf(5) man page
subnet 192.168.100.0 netmask 255.255.255.0 {
range 192.168.100.10192.168.100.100;
option routers192.168.100.1;
option subnet-mask255.255.255.0;
next-server192.168.100.1; #指定tftp服务器位置
filename"pxelinux.0"; #指定PXE引导程序文件名
}
启动dhcp服务
[root@localhost ~]# service dhcpd start
Kickstart安装配置
为了避免在能在操作系统的过程中,需要大量和服务器交互操作,为了减少这个交互过程,kickstart就诞生了。使用这种kickstart,只需要事先定义好一个kickstart自动应答配置文件ks.cfg(通常存放在安装服务器上),并让安装程序只要该配置文件的位置,在安装过程中安装程序就可以自己从该文件中读取安装配置,这样就避免了在安装过程中多次的人机交互,从而实现无人值守的自动化安装。
[root@localhost ~]# yum -y install system-config-kickstart
安装kickstart之后,通过桌面菜单“应用程序”→“系统工具”→“kickstart”就可以打开kickstart配置程序。
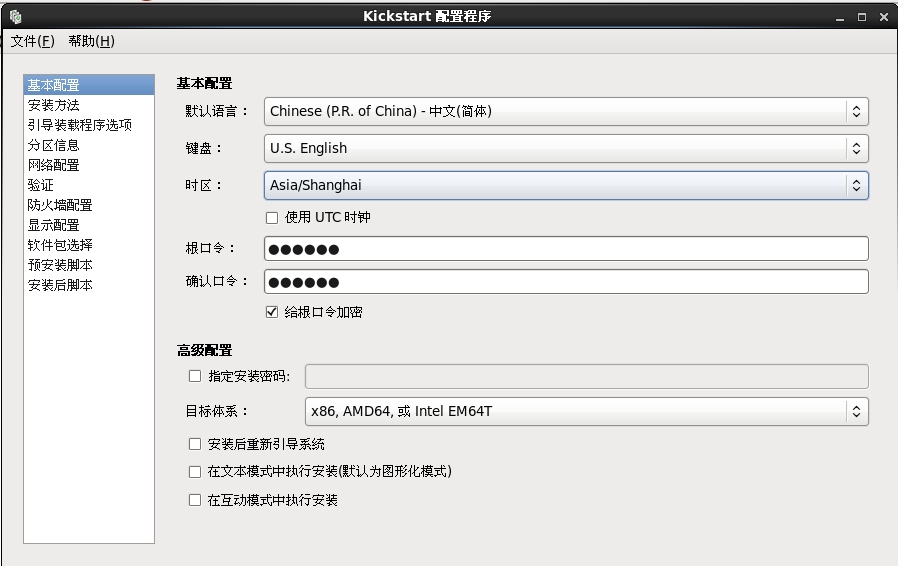
设置nfs服务的地址和目录

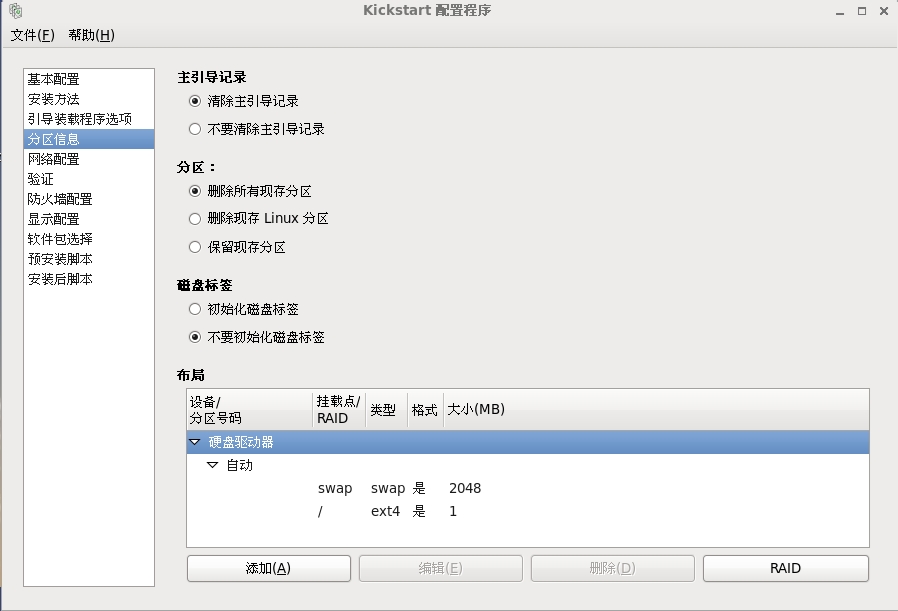
设置磁盘信息
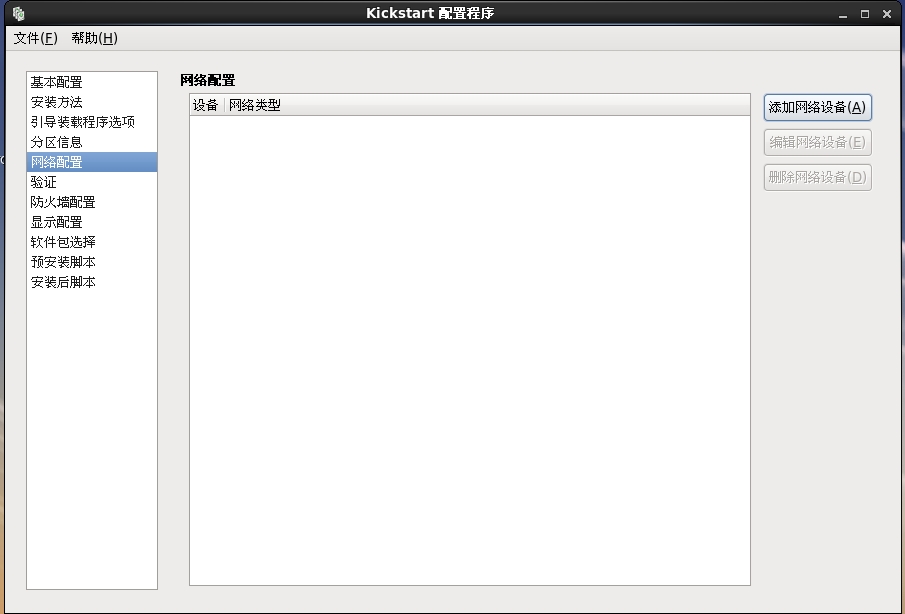
设置网络信息
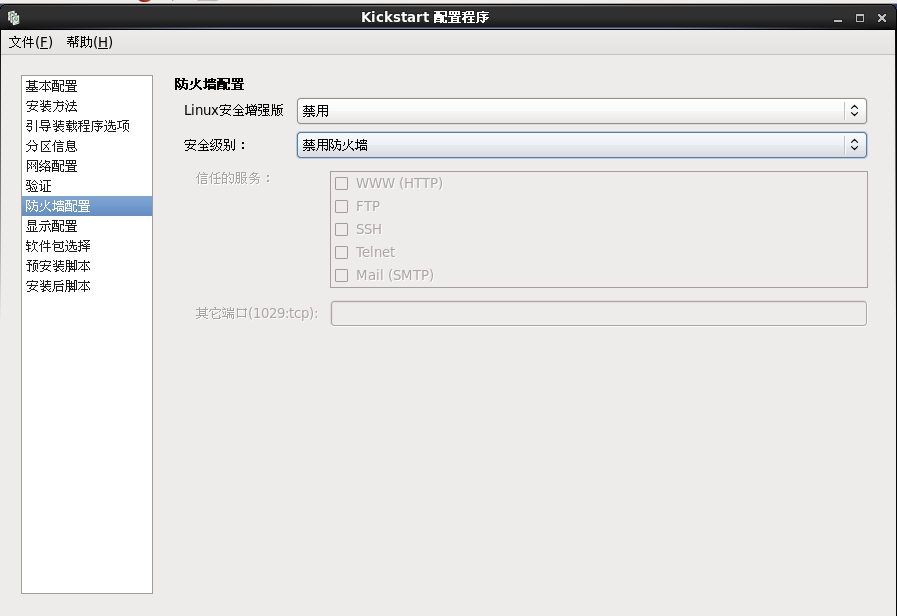
防火墙设置选择禁用即可
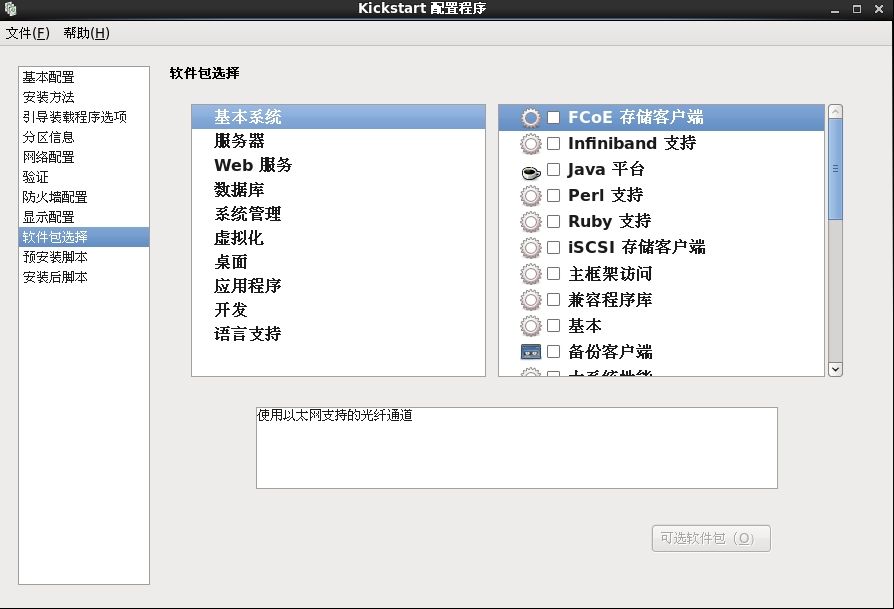
选择安装的相关服务
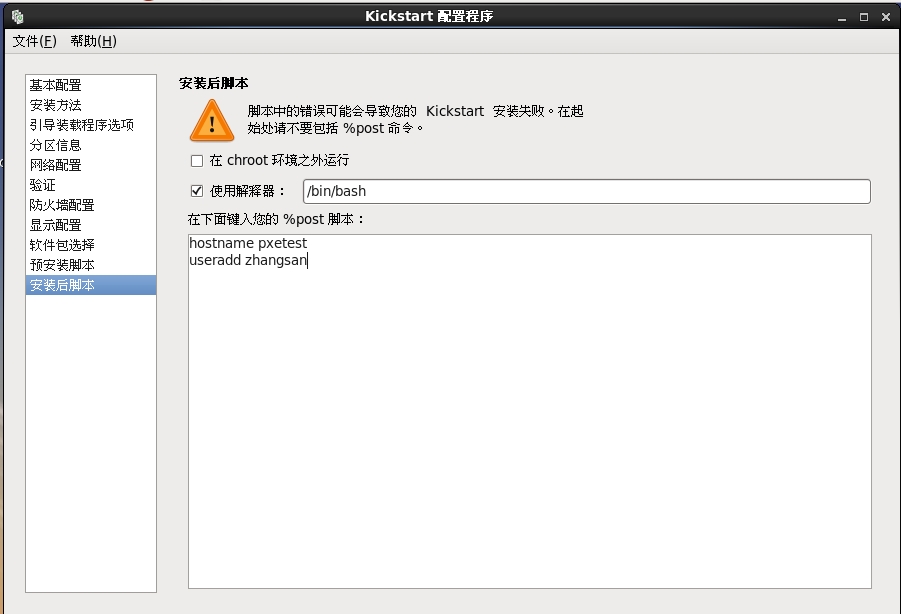
设置安装后的脚本
安装文件如下
[root@localhost ~]# grep -v "#" ks.cfg
firewall --disabled
install
nfs --server=192.168.100.1 --dir=/data/sys
rootpw --iscrypted$1$IT9coR8E$EjlYzCraRb5p1nF8UFWbf/
auth --passalgo=sha512
graphical
firstboot --disable
keyboard us
lang zh_CN
selinux --disabled
logging --level=info
timezone Asia/Shanghai
bootloader --location=mbr
zerombr
clearpart --all
part swap --fstype="swap" --size=2048
part / --fstype="ext4" --grow --size=1
%post --interpreter=/bin/bash
useradd zhangsan
%end
%packages
@base
@basic-desktop
@development
@chinese-support
%end
启动自动应答文件
[root@localhost ~]# cp ks.cfg /data/sys/ks.cfg
修改安装方式为自动
[root@localhost ~]# vim/var/lib/tftpboot/pxelinux.cfg/default
default auto
prompt 0
label auto
kernelvmlinuz
appendks=nfs:192.168.100.1:/data/sys/ks.cfg initrd=initrd.img devfs=nomount ramdisk_size=8192
ks设置应答文件位置
如果有多块网卡可能还需要设置ksdevice=eth0
还可以设置timeout等待时间
设置完成之后,客户端通过网络pxe启动就可以自动安装了
无人值守一键脚本
#!/bin/bash ################################################## # Author : wangjunkang # qq : 2723216002 # Email : [email protected] # Last modified : 2015-03-14 10:17 # Filename : pxe.sh # Description : ################################################## media=/media/ #设置光盘挂载位置 gongxiang=/data/sys #设置nfs共享目录 nfsserver=192.168.100.1 #拷贝系统安装文件 if [ -d $gongxiang ];then daxiao=`du -sh /data/sys/ | awk ‘{print $1}‘` if [ $daxiao == 3.5G ];then echo " " >>/dev/null fi else mkdir $gongxiang -p cp -a $media* $gongxiang fi #设置nfs共享 grep "/data/sys" /etc/exports || echo "/data/sys 192.168.100.0/24(ro,sync)" >> /etc/exports && service nfs start >> /dev/null #设置tftp rpm -qa | grep tftp-server >> /dev/null rpmtftp=`echo $?` if [ $rpmtftp -ne 0 ];then yum -y install tftp-server >>/dev/null sed -i ‘s/disable.*= yes/disable = no/g‘ /etc/xinetd.d/tftp service xinetd start >>/dev/null else grep "disable.*= yes" /etc/xinetd.d/tftp && sed -i ‘s/disable.*= yes/disable = no/g‘ /etc/xinetd.d/tftp && service xinetd reload echo " " >>/dev/null fi #设置dhcp subnet=192.168.100.0 netmask=255.255.255.0 range="192.168.100.10 192.168.100.100" routers="192.168.100.1" subnetmask="255.255.255.0" rpm -qa | grep dhcp.x86_64 >> /dev/null if [ $? -ne 0 ];then yum -y install dhcp >>/dev/null && >/etc/dhcp/dhcpd.conf && cat >>/etc/dhcp/dhcpd.conf<<EOF subnet $subnet netmask $netmask { range $range; option routers $routers; option subnet-mask $subnetmask; next-server $nfsserver; filename "pxelinux.0"; } EOF service dhcpd start >>/dev/null else >/etc/dhcp/dhcpd.conf && cat >>/etc/dhcp/dhcpd.conf<<EOF subnet $subnet netmask $netmask { range $range; option routers $routers; option subnet-mask $subnetmask; next-server $nfsserver; filename "pxelinux.0"; } EOF service dhcpd reload >>/dev/null fi #拷贝安装所需的内核文件和pxe启动文件 rpm -qa | grep syslinux >>/dev/null|| yum -y install syslinux >>/dev/null cp /usr/share/syslinux/pxelinux.0 /var/lib/tftpboot/ cp /$media/images/pxeboot/initrd.img /var/lib/tftpboot/ cp /$media/images/pxeboot/vmlinuz /var/lib/tftpboot/ if [ -d /var/lib/tftpboot/pxelinux.cfg ];then echo "" >>/dev/null else mkdir /var/lib/tftpboot/pxelinux.cfg fi cp /$media/isolinux/isolinux.cfg /var/lib/tftpboot/pxelinux.cfg/default #设置自动应答文件 >/data/sys/ks.cfg cat >>/data/sys/ks.cfg<<EOF firewall --disabled install nfs --server=$nfsserver --dir=$gongxiang rootpw --iscrypted $1$IT9coR8E$EjlYzCraRb5p1nF8UFWbf/ auth --passalgo=sha512 graphical firstboot --disable keyboard us lang zh_CN selinux --disabled logging --level=info timezone Asia/Shanghai bootloader --location=mbr zerombr clearpart --all part swap --fstype="swap" --size=2048 part / --fstype="ext4" --grow --size=1 #reboot %packages @base @chinese-support @client-mgmt-tools @console-internet @core @debugging @directory-client @hardware-monitoring @java-platform @large-systems @network-file-system-client @performance @perl-runtime @server-platform @server-policy pax python-dmidecode oddjob sgpio device-mapper-persistent-data samba-winbind certmonger pam_krb5 krb5-workstation perl-DBD-SQLite %end EOF #设置pxe启动文件 >/var/lib/tftpboot/pxelinux.cfg/default cat >>/var/lib/tftpboot/pxelinux.cfg/default<<EOF default auto prompt 0 label auto kernel vmlinuz append ks=nfs:$nfsserver:$gongxiang/ks.cfg initrd=initrd.img devfs=nomount ramdisk_size=8192 EOF #关闭防火墙和SElinux iptables -F setenforce 0
本文出自 “梅花香自苦寒来” 博客,请务必保留此出处http://wangjunkang.blog.51cto.com/8809812/1620321
郑重声明:本站内容如果来自互联网及其他传播媒体,其版权均属原媒体及文章作者所有。转载目的在于传递更多信息及用于网络分享,并不代表本站赞同其观点和对其真实性负责,也不构成任何其他建议。


