Redhat5 安装oracle10g 启动测试
安装环境: redhat5.5 VirtualBox4.3.12 oracle10g
在虚拟机环境下,直接安装的是带图形界面redhat5.5-server,便于后来方面安装oracle
一 安装部分
1. 安装前的包检查
采用iso光盘挂载作为 yum源安装
[rhel-server]
name=local server
baseurl=file:///mnt/cdrom/Server   //挂载光盘文件为yum源
enabled=1
gpgcheck=0
gpgkey=file:///etc/pki/rpm-gpg/RPM-GPG-KEY-redhat-release
安装如下的包,注意版本号和包依赖
binutils-2*   elfutils-libelf-0*  elfutils-libelf-devel-0*  elfutils-libelf-devel-static-0*  setarch-2*
make-3*  glibc-2*  glibc-devel-2*  glibc-common-2*  glibc-header-*
libaio-0* libaio-devel-0*  compat-libstdc++-33-3*   kernel-headers-*  ksh-*  compat-gcc-34-3*
compat-gcc-34-c++-3*  libgcc-4*  libstdc++-4*   libstdc++-devel-4*   libgomp-4*
gcc-4*  gcc-c++-4*   libXp-1*  libXt  openmotif22-*  compat-db-4*   sysstat-7*
unixODBC-2*  unixODBC-devel-2*
rpm -q binutils elfutils-libelf elfutils-libelf-devel elfutils-libelf-devel-static setarch make glibc glibc-devel glibc-common glibc-headers libaio libaio-devel compat-libstdc++-33 kernel-headers ksh compat-gcc-34 compat-gcc-34-c++ libgcc libstdc++ libstdc++-devel libgomp gcc gcc-c++ libXp libXt openmotif compat-db sysstat unixODBC unixODBC-devel
2.修改系统参数
内核参数 /etc/sysctl.conf
 kernel.shmall = 2097152
 kernel.shmmax = 2147483648
 kernel.shmmni = 4096
 kernel.sem = 250 32000 100 128
 fs.file-max = 65536
 net.ipv4.ip_local_port_range = 1024 65000
 net.core.rmem_default=262144
 net.core.rmem_max=262144
 net.core.wmem_default=262144
 net.core.wmem_max=262144
sysctl -p 使参数生效
关闭seLinux /etc/selinux/config
SELINUX=disabled
设置oracle用户的shell limit /etc/security/limits.conf
oracle soft nproc 2047
oracle hard nproc 16384
oracle soft nofile 1024
oracle hard nofile 65536
oracle10g 只支持到了redhat-4, 修改/etc/redhat-release
redhat-4
3. 创建Oracle用户组 及目录
 groupadd -g 500 dba
 groupadd -g 501 oinstall
 useradd -g oinstall -G dba -s /bin/bash -u 501 oracle
 passwd oracle
 mkdir -p /oracle/app/oracle/product/10.2/db_1
 chown -R oracle:oinstall /oracle
 chmod -R 775 /oracle
4. 修改oracle用户 .bash_profile
export ORACLE_BASE=/oracle/app/oracle
export ORACLE_HOME=$ORACLE_BASE/product/10.2/db_1
export ORACLE_SID=bi4db
export PATH=$PATH:$ORACLE_HOME/bin
export LD_LIBRARY_PATH=$LD_LIBRARY_PATH:$ORACLE_HOME/lib
CLASSPATH=$ORACLE_HOME/JRE:$ORACLE_HOME/jlib:$ORACLE_HOME/rdbms/jlib
export CLASSPATH
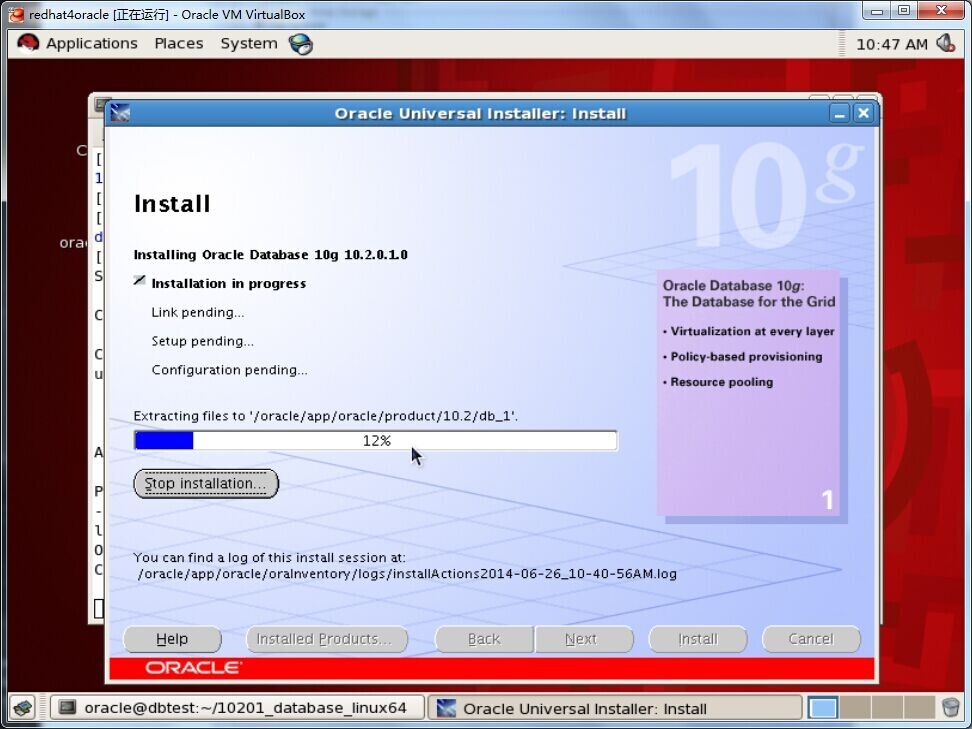
5.解压安装
unzip 10201_database_linux64.zip
./runInstaller  // 遇到没有执行权限文件 chmod +x xxx
二、进程启动
1.oracle监听器listener
lsnrctl start
lsnrctl stop
/oracle/app/oracle/product/10.2/db_1/bin/tnslsnr LISTENER -inherit
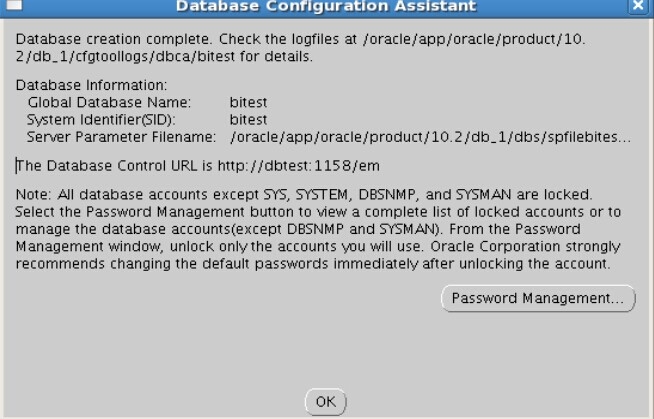
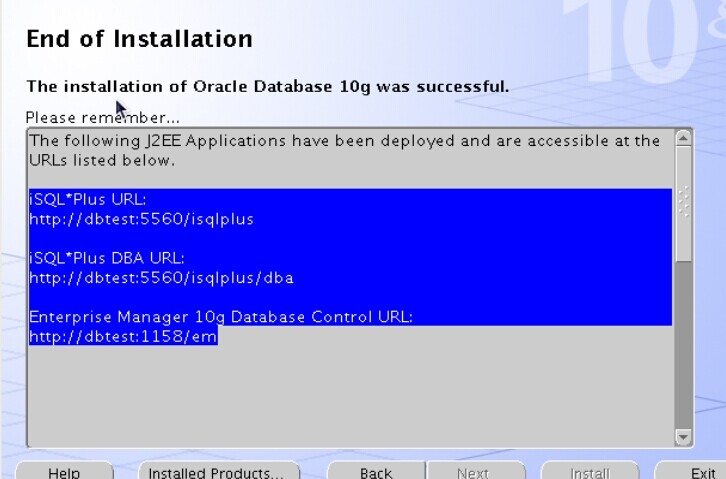
2.oracle OEM启动
emctl start dbconsole
emctl stop dbconsole
http://192.168.30.6:1158/em  sys/pwd sysdba登陆
3.isql*plus的启动
isqlplusctl start
isqlplusctl stop
4. 数据库启动停止
[oracle@dbtest 10201_database_linux64]$ sqlplus
SQL*Plus: Release 10.2.0.1.0 - Production on Thu Jun 26 14:54:36 2014
Copyright (c) 1982, 2005, Oracle.  All rights reserved.
Enter user-name: / as sysdba
Connected to:
Oracle Database 10g Enterprise Edition Release 10.2.0.1.0 - 64bit Production
With the Partitioning, OLAP and Data Mining options
SQL> shutdown immediate;
Database closed.
Database dismounted.
ORACLE instance shut down.
SQL> startup
ORACLE instance started.
Total System Global Area  444596224 bytes
Fixed Size                  2021408 bytes
Variable Size             138414048 bytes
Database Buffers          297795584 bytes
Redo Buffers                6365184 bytes
Database mounted.
Database opened.
SQL>
三、测试scott/tiger
解锁scott用户,登陆测试
SQL> conn scott;
Enter password:
ERROR:
ORA-28000: the account is locked
SQL> conn system;
Enter password:
Connected.
SQL>
SQL> alter user scott account unlock;
User altered.
SQL> show user;
USER is "SCOTT"
本文出自 “方法总比问题多” 博客,请务必保留此出处http://xubcing.blog.51cto.com/3502962/1431168
郑重声明:本站内容如果来自互联网及其他传播媒体,其版权均属原媒体及文章作者所有。转载目的在于传递更多信息及用于网络分享,并不代表本站赞同其观点和对其真实性负责,也不构成任何其他建议。


