
android:layout_weight属性的工作原理
android:layout_weight属性告知LinearLayout如何进行子组件的布置安排。
我们已经为两个组件设置了同样的值,但这并不意味它们在屏幕上占据着同样的宽
度。在决定子组件视图的宽度时,LinearLayout使用的是layout_width与
layout_weight参数的混合值。LinearLayout是分两个步骤来设置视图宽度的。
activity_main.xml


1 <LinearLayout xmlns:android="http://schemas.android.com/apk/res/android"
 2     xmlns:tools="http://schemas.android.com/tools"
 3     android:layout_width="match_parent"
 4     android:layout_height="match_parent"
 5     android:orientation="horizontal"
 6     tools:context=".MainActivity" >
 7
 8     <CheckBox
 9         android:id="@+id/checkBox1"
10         android:layout_width="wrap_content"
11         android:layout_height="wrap_content"
12         android:layout_weight="1"
13         android:text="显示" />
14
15     <Button
16         android:id="@+id/button1"
17         android:layout_width="wrap_content"
18         android:layout_height="wrap_content"
19         android:layout_weight="1"
20         android:text="按钮" />
21
22 </LinearLayout>
第一步,LinearLayout查看layout_width属性值(竖直方位则查看layout_height
属性值)。Button和CheckBox组件的layout_width属性值都设置为wrap_content,因此
它们获得的空间大小仅够绘制自身,如图1所示
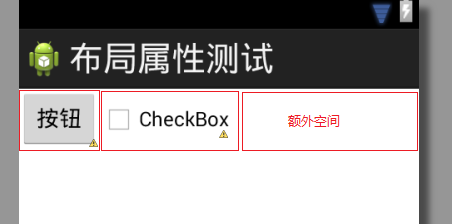
图1 第一步:基于layout_width属性值分配的空间大小
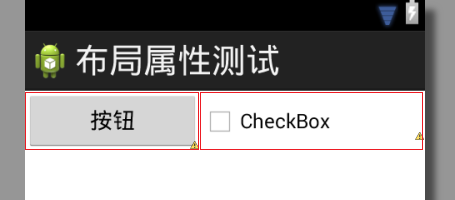
图2 第二步:基于1∶1layout_weight属性值分配的额外空间
在布局中,Button和CheckBox组件拥有相同的layout_weight属性值,因
此它们均分了同样大小的额外空间。如将Button组件的weight值设置为2,那么
它将获得2/3的额外空间,CheckBox组件则获得剩余的1/3,如图3所示。
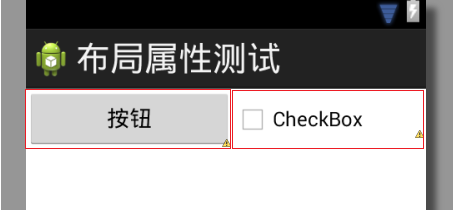
图3基于2∶1layout_weight属性值不等比分配的额外空间
weight设置值也可以是浮点数。对于weight设置值,开发者有着各自的使用习惯。
在activity_main.xml中,我们使用的是一种cocktail recipe式的weight设置风格
。另一种常见的设定方式是各组件属性值加起来等于1.0或100。这样,上个例子中按钮
组件的weight值则应该是0.66或66。
如想让LinearLayout分配完全相同的宽度给各自的视图,该如何处理呢?很简单,
只需设置各组件的layout_width属性值为0dp以避开第一步的空间分配就可以了,这样
LinearLayout就会只考虑使用layout_weight属性值来完成所需的空间分配了,如图4
所示。
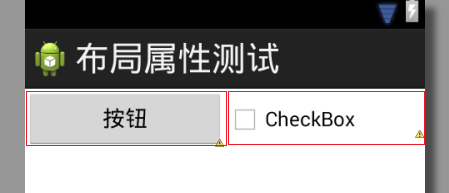
图4layout_width="0dp",基于1∶1layout_weight属性值
郑重声明:本站内容如果来自互联网及其他传播媒体,其版权均属原媒体及文章作者所有。转载目的在于传递更多信息及用于网络分享,并不代表本站赞同其观点和对其真实性负责,也不构成任何其他建议。


