linux编译内核步骤与错误解决
1、查看内核版本
实验环境
[root@lnmp src]# uname -r
2.6.32-358.el6.x86_64
2、安装图形依赖包
yum install -y ncurses ncurses-devel
3、下载内核
[root@lnmp src]# wget https://www.kernel.org/pub/linux/kernel/v3.x/linux-3.16.2.tar.xz
解压
[root@lnmp src]# tar -xf linux-3.16.2.tar.xz -C /usr/src/
4、编译安装
[root@lnmp src]# cd /usr/src/linux-3.16.2
[root@lnmp linux-3.16.2]# make mrproper
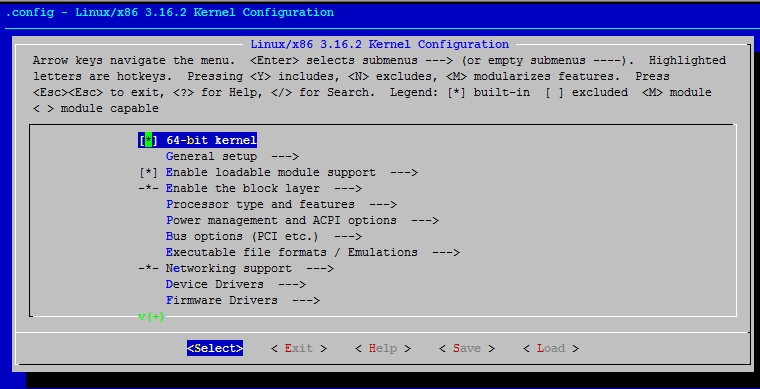
[root@lnmp linux-3.16.2]#make menuconfig
设置好,保存并退出。
……
*** End of the configuration.
*** Execute ‘make‘ to start the build or try ‘make help‘.
[root@lnmp linux-3.16.2]# make
……
/bin/sh: bc: command not found
make[1]: *** [kernel/timeconst.h] Error 127
make: *** [kernel] Error 2
报错:缺少bc
[root@lnmp src]# yum install -y bc
再次运行
[root@lnmp linux-3.16.2]# make
相当于:make dep(建立相依的属性关系),make clean(将旧的资料去除掉),make bzImage(开始编译核心),make modules(开始编译模块)
该过程大概要1、2小时。
报错:
drivers/tty/serial/built-in.o: final close failed: No space left on device
make[3]: *** [drivers/tty/serial/built-in.o] Error 1
make[2]: *** [drivers/tty/serial] Error 2
make[1]: *** [drivers/tty] Error 2
make: *** [drivers] Error 2
原因是磁盘空间不足,需要清理磁盘或者扩展磁盘
[root@kernel linux-3.16.2]# make modules_install
安装模块到/lib/modules/,以后程序运行时从这个目录加载模块。
[root@kernel linux-3.16.2]# make install
安装内核
把make all 生成的vmlinuz和System.map复制到/boot目录下同时修改grub /boot/grub/menu.lst. 修改menu.lst不用手动修改。
sh ./arch/x86/boot/install.sh 3.16.2 arch/x86/boot/bzImage \
System.map "/boot"
ERROR: modinfo: could not find module snd_page_alloc
ERROR: modinfo: could not find module vmware_balloon
报错
早已加载这两个模块的:
[root@kernel linux-3.16.2]# lsmod |grep snd_page_alloc
snd_page_alloc 8470 1 snd_pcm
[root@kernel linux-3.16.2]# lsmod |grep vmware_balloon
vmware_balloon 7199 0
查看下grub
[root@kernel linux-3.16.2]# cat /boot/grub/grub.conf
#
# Note that you do not have to rerun grub after making changes to this file
# NOTICE: You have a /boot partition. This means that
# all kernel and initrd paths are relative to /boot/, eg.
# root (hd0,0)
# kernel /vmlinuz-version ro root=/dev/mapper/VolGroup-lv_root
# initrd /initrd-[generic-]version.img
#boot=/dev/sda
default=1
timeout=5
splashimage=(hd0,0)/grub/splash.xpm.gz
hiddenmenu
title Red Hat Enterprise Linux Server (3.16.2)
root (hd0,0)
kernel /vmlinuz-3.16.2 ro root=/dev/mapper/VolGroup-lv_root rd_NO_LUKS LANG=en_US.UTF-8 rd_NO_MD rd_LVM_LV=VolGroup/lv_swap SYSFONT=latarcyrheb-sun16 crashkernel=auto rd_LVM_LV=VolGroup/lv_root KEYBOARDTYPE=pc KEYTABLE=us rd_NO_DM rhgb quiet
initrd /initramfs-3.16.2.img
title Red Hat Enterprise Linux (2.6.32-358.el6.x86_64)
root (hd0,0)
kernel /vmlinuz-2.6.32-358.el6.x86_64 ro root=/dev/mapper/VolGroup-lv_root rd_NO_LUKS LANG=en_US.UTF-8 rd_NO_MD rd_LVM_LV=VolGroup/lv_swap SYSFONT=latarcyrheb-sun16 crashkernel=auto rd_LVM_LV=VolGroup/lv_root KEYBOARDTYPE=pc KEYTABLE=us rd_NO_DM rhgb quiet
initrd /initramfs-2.6.32-358.el6.x86_64.img
已经多了新的内容。那么之前有两个报错的模块我们可以忽略。
那么修改default=1为default=0
5、重启
[root@kernel ~]# uname -a
Linux kernel 3.16.2 #1 SMP Wed Sep 17 04:18:19 CST 2014 x86_64 x86_64 x86_64 GNU/Linux
编译成功
关于报错:
[root@kernel linux-3.16.2]# make modules_install
sh ./arch/x86/boot/install.sh 3.16.2 arch/x86/boot/bzImage \
System.map "/boot"
ERROR: modinfo: could not find module snd_page_alloc
ERROR: modinfo: could not find module vmware_balloon
如果你的 CentOS 是安装在 VMware 上的话,在最后 make install 这一步的时候有可能会看到这样的警告:
ERROR: modinfo: could not find module vmware_balloon
从字面上来看,是找不到 vmware_balloon 模块,这个 vmware_balloon 实际上被称之为内存释放或者气球膨胀(参见这篇文章),可能的原因有2个:
首先,确认你的 .config 文件里面有 CONFIG_VMWARE_BALLOON=m 这一行,或者你可以用 make menuconfig 进去内核编译菜单,选中 Device Drivers -> MISC devices -> VMware Balloon Driver 为 M 或者 *
其次,而这个模块在后面的版本中,已经更名为 vmw_balloon,所以 可以用下面的命令来解决:
cd /lib/modules/3.x.xx/kernel/drivers/misc #将版本号改成你自己的
ln -s vmw_balloon.ko vmware_balloon.ko #建立软连接
Tips:
如果你最后 make install 的时候有很多 could not find module xxxx 的错误,而你又不知道其对应的是 .config 中哪一项的时候,可以用这条命令:
grep -R --include=Makefile ‘\bNAME\.o\b‘
以上解决方法来自:http://winotes.net/centos-64-upgrade-to-kernel-3x.html
本文出自 “习惯” 博客,请务必保留此出处http://xiguanmin.blog.51cto.com/4857855/1553714
郑重声明:本站内容如果来自互联网及其他传播媒体,其版权均属原媒体及文章作者所有。转载目的在于传递更多信息及用于网络分享,并不代表本站赞同其观点和对其真实性负责,也不构成任何其他建议。


