
IOS 7.0+ Autolayout — tableviewCell height
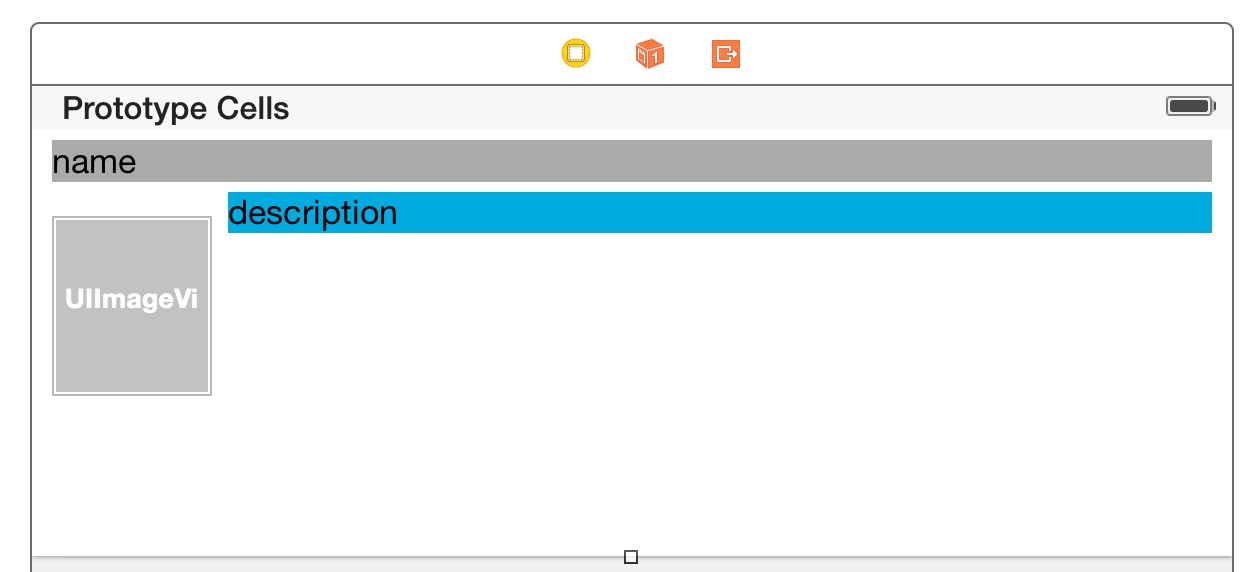
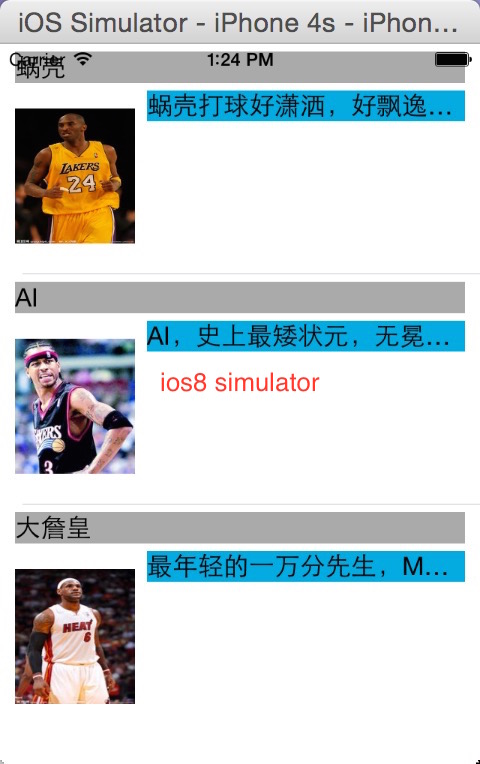
要实现的效果

要求:
一般titleLabel 仅显示一行标题,高度为固定。
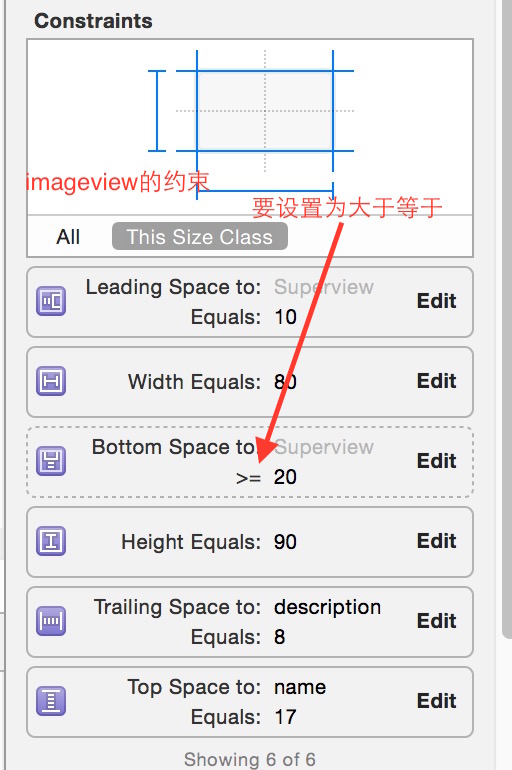
imageview 大小也为固定。
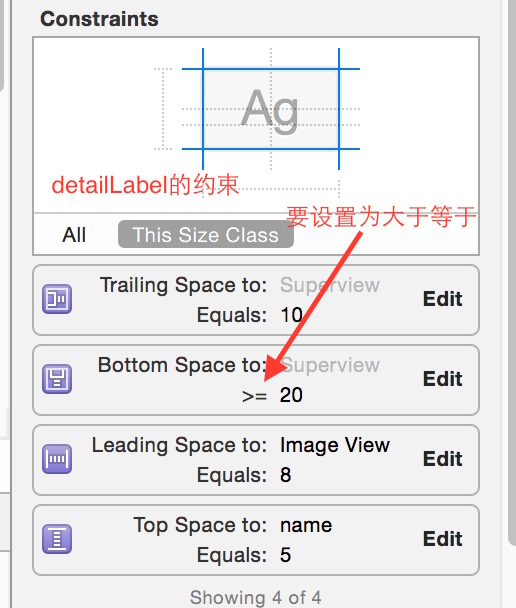
detailLabel 宽度固定,但高度根据文本动态调整。
cell 底部拒imageview 的底部以及detailLabel 底部高度都是大于等于20。
当detailLabel文字很少时,cell底部拒imageview底部维持20,这时detaillabel底部距cell 底部大于20.
当detailLabel文字很多时,cell底部距imageview底部超过20,与detailLabel底部高度维持20.
storyboard上的准备工作
注意将detailLabel numberOfLines 设为0
建好cell自定义AutoCell 类,关联好控件,事先准备好一些数据源
    nameArray = [NSMutableArray arrayWithObjects:@"蜗壳",@"AI",@"大詹皇",nil];
    imageArray = [NSMutableArray arrayWithObjects:@"u=4040080498,3072784853&fm=90&gp=0.jpg",@"u=2384677404,2895132414&fm=21&gp=0.jpg",@"u=262781505,2408318453&fm=21&gp=0.jpg", nil];
    descriptionArray = [NSMutableArray arrayWithObjects:@"蜗壳打球好潇洒,好飘逸,铁王之王",@"AI,史上最矮状元,无冕之王,crossover简直厉害,观赏性强,永远的MVP!!!!",@"最年轻的一万分先生,MVP,奥布莱恩杯,效率之王,天之骄子,全宇宙最强的球员没有之一,强突暴扣身体棒,发际线又高了,关键时刻又耸了,带领骑士夺冠吧,虽然看起来还没戏!!!!!!", nil];
实现tableview的委托方法
//numberOfRows
-(NSInteger)tableView:(UITableView *)tableView numberOfRowsInSection:(NSInteger)section
{
    return 3;
}
//cellForRow
-(UITableViewCell*)tableView:(UITableView *)tableView cellForRowAtIndexPath:(NSIndexPath *)indexPath
{

    AutoTableViewCell *cell = (AutoTableViewCell*)[tableView dequeueReusableCellWithIdentifier:@"autoCell"];
    [cell.titleLabel setText:nil];
    [cell.titleLabel setText:[nameArray objectAtIndex:indexPath.row]];
    [cell.descriptionLabel setText:nil];
    [cell.logoImageView setImage:[UIImage imageNamed:[imageArray objectAtIndex:indexPath.row]]];
    [cell.descriptionLabel setText:[descriptionArray objectAtIndex:indexPath.row]];
    return cell;
}
先不实现HeightForRow方法,直接运行,发现ios7,ios8上都没有得到想要的效果
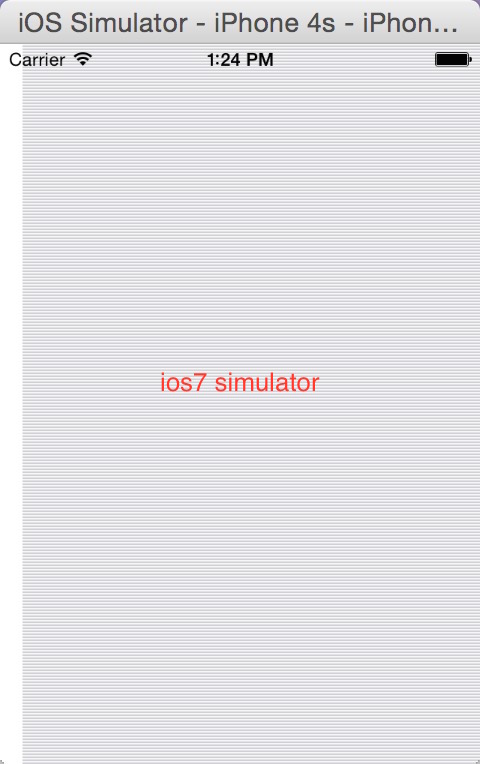
IT‘S SO BAD!!!
核心部分,HeightForRow方法实现
-(CGFloat)tableView:(UITableView *)tableView heightForRowAtIndexPath:(NSIndexPath *)indexPath
{
    static AutoTableViewCell *cell = nil;
    static dispatch_once_t onceToken;
    //只会走一次
    dispatch_once(&onceToken, ^{
        cell = (AutoTableViewCell*)[tableView dequeueReusableCellWithIdentifier:@"autoCell"];
    });

    //calculate
    CGFloat height = [cell calulateHeightWithtTitle:[nameArray objectAtIndex:indexPath.row] desrip:[descriptionArray objectAtIndex:indexPath.row]];

    return height;
}
具体的计算高度方法是现在自定义cell类中
-(CGFloat)calulateHeightWithtTitle:(NSString*)title desrip:(NSString*)descrip
{
    //这里非常重要
    CGFloat preMaxWaith =[UIScreen mainScreen].bounds.size.width-108;
    [self.detailLabel setPreferredMaxLayoutWidth:preMaxWaith];
    [self.titleLabel setText:title];
    //这也很重要
    [self.detailLabel layoutIfNeeded];
    [self.detailLabel setText:descrip];
    [self.contentView layoutIfNeeded];
    CGSize size = [self.contentView systemLayoutSizeFittingSize:UILayoutFittingCompressedSize];
    //加1是关键
    return size.height+1.0f;
}
几大需要注意的地方
首先说为什么要设置 PreferredMaxLayoutWidth, 表示label的最大的布局宽度,label显示多少行与它的宽度肯定有关,所有这里要设置正确的宽度,但这里有点坑的地方
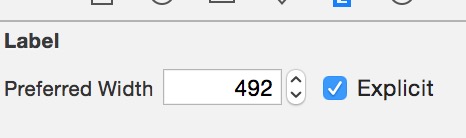
这是storyboard 上detailLabel 的该属性,默认是没有勾选的(automatic)表示系统自动计算最大布局宽度,但是查看官方文档,你会发现自动计算只有在ios8中才会有效果,低于ios8不会自动计算。这时你可能会说:那把它勾上吧!!!
如图,勾上之后你发现显示的是492,这是什么意思?这个数字是当前使用的storyboard 的宽度减去label到两边界的绝对距离。xcode6 为大尺寸storyboard 宽度600 ,减去 detailLabel 距左边界98,减去距右边界10,刚好492.
但是这样对吗?很明显不对,iphone 屏幕宽度不是已经有3种宽度了么?320、375(iphone6)、414(plus)
所以600很明显不对,应该用当前运行的宽度来减去108,所以这里勾不勾都是错,干脆不勾了直接代码算吧....
CGFloat preMaxWaith =[UIScreen mainScreen].bounds.size.width-108;
关于layoutIfNeeded到底是干嘛的,我也是一知半解,只知道不加效果出不来,打算之后再去查阅...
加1是关键
[self.contentView systemLayoutSizeFittingSize:UILayoutFittingCompressedSize];
return size.height+1.0f;
这里size.height 实际上是我们要的contentview 的高度,但是我们如果直接将这个高度返回,就赋给了cell的高度,但是由于cell 分界线的原因,cell的高度比contentview高度多1,所以这里加1再返回。不要小看1像素,少了它效果还真就出不来!!!!
注意了这些,我们再运行,发现得到了想要的效果,切换模拟器,也没问题。


总之,研究了几天布局,发现ios好坑,各种陷阱,好在查阅了中外各种资料,最终还是实现了效果。
这套代码还没在ios6上试过,ios6上情况又不一样了,待我再去研究研究.....
郑重声明:本站内容如果来自互联网及其他传播媒体,其版权均属原媒体及文章作者所有。转载目的在于传递更多信息及用于网络分享,并不代表本站赞同其观点和对其真实性负责,也不构成任何其他建议。


